F2 EcoHull is a special fouling release system – not a classic antifouling paint. When built up correctly, you get a very smooth, robust surface that is easy to clean and offers good performance over many seasons.
Application is also well within the reach of DIY owners if you follow the instructions exactly. Deviations can lead to poor adhesion or detachment.
⚠️ IMPORTANT SAFETY INSTRUCTIONS
- Slip hazard: The F2 surface is extremely smooth. Secure the boat appropriately when craning and jacking up.
- Personal Protective Equipment (PPE): Always wear gloves, goggles, and a protective suit. A mask is recommended but not mandatory.
- Fire hazard: Larger residual amounts of F2 EcoPrimer develop extreme heat when curing! Never leave residues unattended.
Understanding the F2 EcoHull System
Each component fulfills a specific technical task:
- F2 Degreasing Solution: Environmentally friendly, solvent-free cleaner. Must be diluted 1:10 with water.
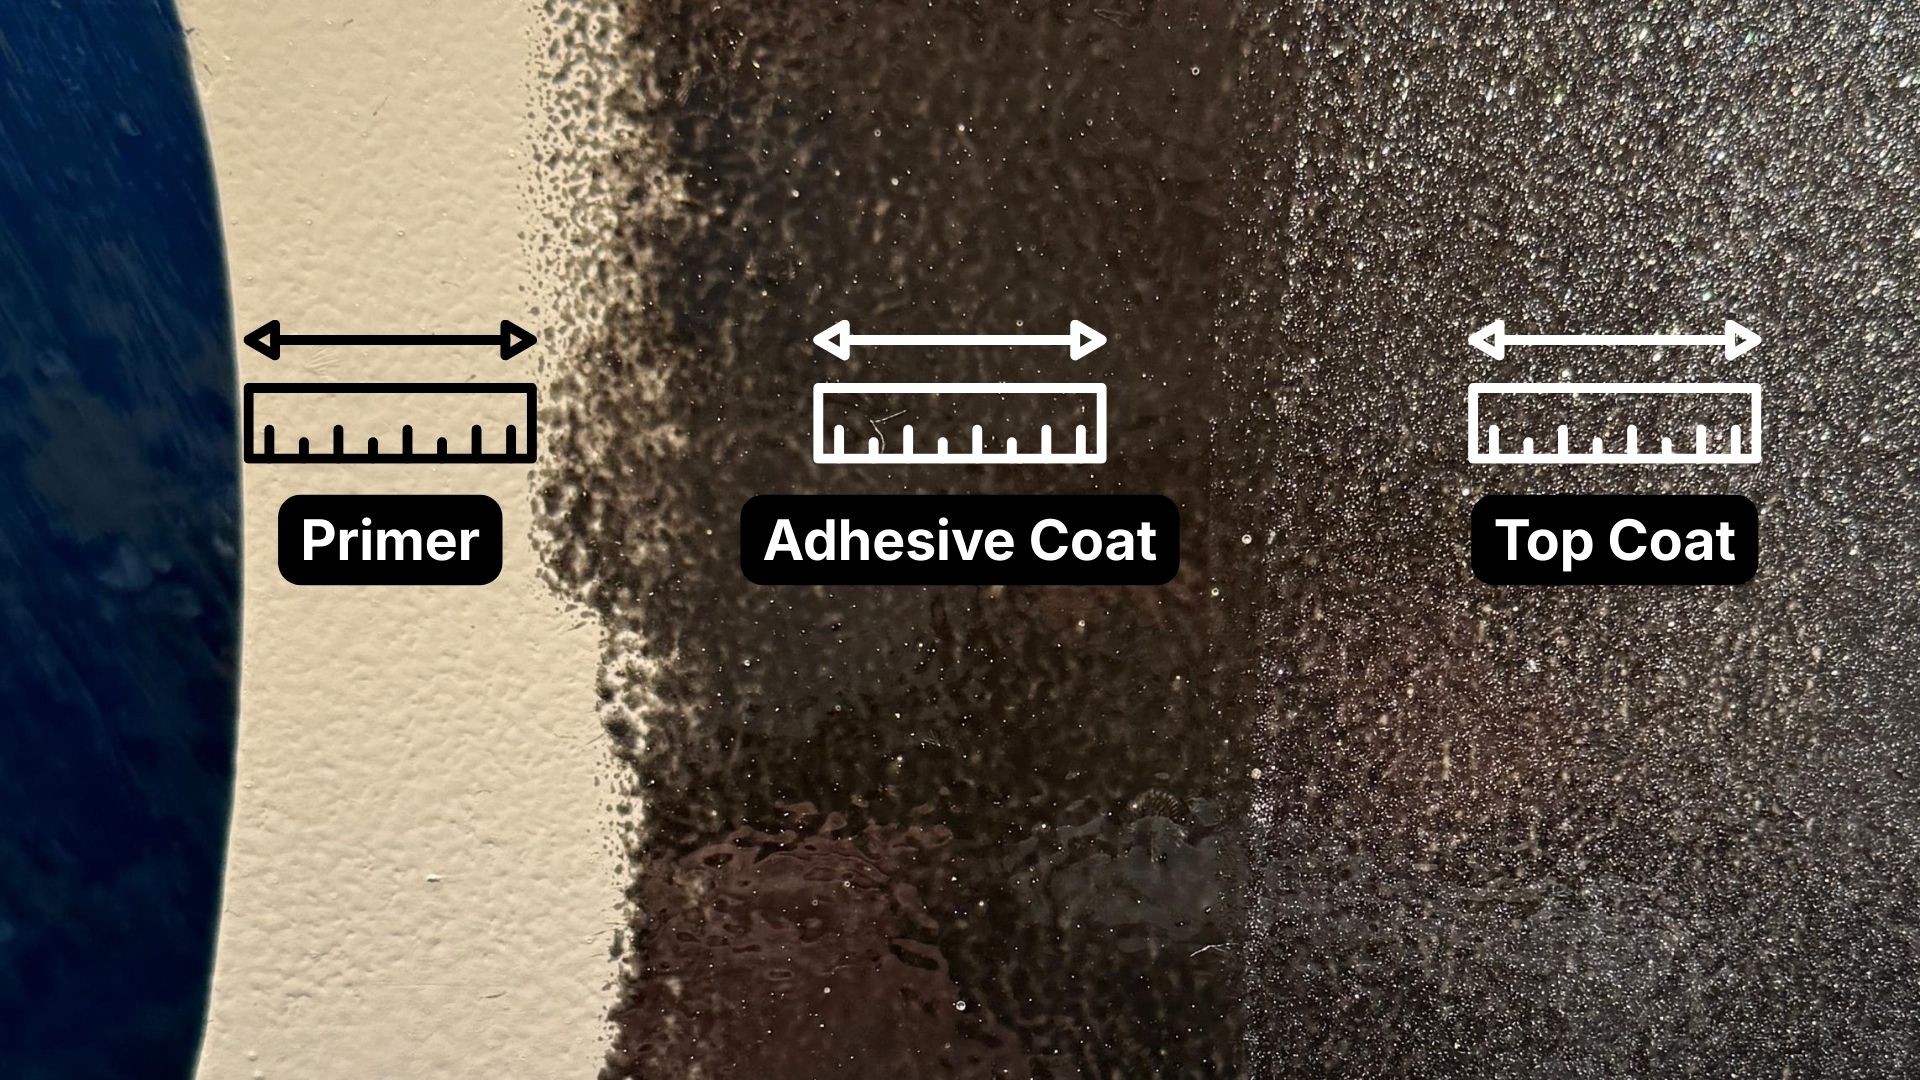
- F2 EcoPrimer: Water-based 2K epoxy primer. Serves as a conversion primer (bonding bridge), but is not an osmosis barrier coat.
- F2 EcoHull Adhesive Coat: 1K polymer bonding agent and coloring layer. Must be stirred thoroughly, as pigments often settle at the bottom of the can.
- F2 EcoHull Top Coat: The final, transparent protective layer. Available with or without Sparkle Effect.
Quick Overview
- Substrate must be dry, clean, and load-bearing.
- Do not use solvents or thinners – only Degreasing Solution.
- Coverage: approx. 10 m² per liter. Do not apply too thinly!
- Mixing is important: You must use a stirring attachment for a cordless screwdriver.
1. Preparation and Environmental Conditions
1.1 Checklist – what you should have ready
- F2 EcoPrimer, Adhesive Coat & Top Coat
- F2 Degreasing Solution & Personal Protective Equipment
- High-quality masking tape & Random orbital sander
- Stirring attachment for the cordless screwdriver
- Epoxy mixing cups & Paint trays
- Firm foam rollers or lint-free felt rollers (no high-pile rollers!)
- Fine brushes & large paper roll for cleaning
1.2 Environmental Conditions & Framework
| Requirement | Details and Specification |
|---|---|
| Suitable Substrates | Gelcoat, aluminum, steel, wood, plastic (e.g., PVC) |
| Hull Condition | Must be dry. Check with a moisture meter if in doubt. |
| Air Temperature | At least > 10 °C |
| Surface Temperature | At least > 3 °C above the dew point; avoid condensation! |
| Humidity | Maximum < 90 % |
| Workspace | Isolate! Do not sand or polish nearby (adhesion problems!). |
| Product Storage | Reclose cans tightly after opening and use up within a few days. |
| Thinning | Never thin! The viscosity is exactly tuned for application and performance. |
| Tools | Firm foam roller or lint-free felt roller with rounded edges. |
2. Substrate Preparation
2.1 Scenario A: The hull is coated with antifouling
- Check: Critically examine existing coatings: are there blisters, cracks, flaking, or soft spots?
- Removal: You should consistently remove anything that is damp, loose, soft, or brittle until you reach a clean and load-bearing substrate.
- Silicone: Silicone-based coatings must be completely removed without residue.
- Coppercoat: Coppercoat coatings usually do not need to be completely removed; it is sufficient to sand the hull until the green oxidation layer is completely removed. Then clean very thoroughly.
2.2 Scenario B: The hull is "naked" (New or sanded down)
If the hull is "naked," we recommend applying a barrier coat as osmosis or corrosion protection before coating the hull with F2 EcoHull.
Which primer should you use?
- 2K Epoxy Primer with low solvent content (e.g., Hempel Light, or Hempel High Protect II) can be overcoated with F2 EcoHull Adhesive Coat within 24 hours without problems. If work does not continue within 24 hours, the surface must be thoroughly sanded with P180 and cleaned.
- Solvent-based 2K Epoxy Primers: Can be used, but must air out for at least 7 days at 20 °C after application so that all solvents can escape, preventing the risk of trapping solvents under the F2 coating, which can lead to adhesion problems. Afterward, the surface must be thoroughly sanded with P180 and cleaned.
2.3 Sanding and Cleaning
- Sanding: Sand with a random orbital sander and grit P80–180 until an evenly matte, smooth surface is achieved. Refine edges and hard-to-reach areas by hand.
- Cleaning: Dilute F2 Degreasing Solution 1:10 with fresh water.
- Wiping technique: Wipe with a clean sponge or cloth in one direction only. Avoid scrubbing back and forth, as you will otherwise only distribute dissolved grease and residues on the surface instead of effectively picking them up. Repeat the process if necessary until the surface is absolutely residue-free.
- Rinsing: Rinse the entire surface thoroughly with clear water after degreasing.
- Drying: The substrate must be absolutely dry before the first coat. Moisture under the coating inevitably leads to detachment.
3. The Coating Steps
For all layers: The goal is an even, closed wet film with a slight sheen. If the layer looks very patchy or dry, it is better to use slightly more material.
Target Coverage: approx. 10 m² per liter (per component). This corresponds to a layer thickness of ~100 microns per component.
Technique: Apply all layers evenly in a cross-coat pattern (horizontally then vertically).
3.1 F2 EcoPrimer (2K System)
The EcoPrimer is a water-based 2-component system. Since it cures chemically, adherence to mixing ratios and time windows is the most important prerequisite for a perfect result.
A. Mixing
Observe pot life: Since the material reacts quickly after mixing, you should only mix as much as you can safely process within the pot life. The pot life is ~30 minutes at 20 °C ambient temperature.
Pre-stirring: Stir the BASE thoroughly in the can before removal to homogenize settled components.
Mixing: Mix the BASE and the ACTIVATOR in the exact ratio of 60:40 in a clean mixing cup.
No additives: The primer is not thinned. Any addition of water or solvents destroys the chemical formula.
B. Application
Layer thickness: The target coverage is approx. 10 m² per liter. Apply the material neither too thinly nor too thickly to obtain a closed film.
Cross-coat: Apply the primer in a cross-coat – roll first horizontally and immediately afterwards vertically. This ensures that the surface structure of the hull is completely wetted.
C. Waiting Time and Intervals
Overcoatability: The primer is touch-dry after approx. 4 hours at 20 °C and ready for the next layer.
The 24-hour window: The optimal chemical bond to the subsequent Adhesive Coat is achieved if it is applied within 24 hours.
Exceeding the interval: If more than 24 hours pass, the surface is too cured. In this case, you must sand the surface again with P180 and clean it to restore the necessary mechanical adhesion.
3.2 F2 EcoHull Adhesive Coat (1K)
The Adhesive Coat is a 1-component polymer that serves as a bonding agent and coloring base.
A. Preparation
Stir thoroughly: Open the can and stir the content extremely thoroughly while still in the can, ideally with the machine stirring attachment. The pigments in the polymer tend to settle at the bottom of the can.
No thinning: The material is ready to use and must not be thinned!
B. Application
Saturation layer: Ensure a well-covering layer with a coverage of approx. 10 m² per liter. Do not apply the material too thinly.
Cross-coat technique: Also use the cross-coat consistently here (roll horizontally first, then vertically). The goal is an absolutely even, smooth film without flaws.
Support management: Leave a border of approx. 5 cm around the boat supports to the previous primer edge.
C. Waiting Time and Intervals
Drying: The layer is touch-dry after about 4 hours at 20 °C.
Overcoating window: A great advantage of the Adhesive Coat is that there is no maximum overcoating interval. You can apply the Top Coat even days later, provided the surface has remained absolutely clean, dry, and dust-free.
3.3 F2 EcoHull Top Coat (1K)
The Top Coat is the functional layer that provides fouling-release properties and speed.
Application: Analogous to the Adhesive Coat, stir thoroughly and apply thickly in a cross-coat (approx. 10 m² per liter). Do not thin!
Immediate correction: Runs or drips must be smoothed out immediately after they occur.
Overlapping: Again, leave a 5 cm border to the edge of the Adhesive Coat so that the Adhesive Coat can be painted with an overlap after moving the stands.
Waiting time: The Top Coat is touch-dry after about 4 hours.
4. Craning, Curing, and Care
Find more detailed instructions under this link.
This last step is critical. Although the coating is applied, it only develops its final mechanical properties now. Since F2 EcoHull is extremely smooth, handling the boat requires special care.
4.1 Preparation for Craning
Before the crane operator attaches the slings, please observe the following points to avoid damage to the boat or the coating:
- Waiting time: Wait at least 36 hours after applying the Top Coat before suspending the boat in the slings. The coating must be pressure-resistant enough to support the weight of the boat.
- Securing against slipping (IMPORTANT): Ask the crane operator to tie the slings together under the hull (secure) to prevent them from sliding apart.
Clean slings: Ensure that the crane slings are clean and free of sand or sharp edges. Ideally, use soft pads or fleece between the sling and the hull to protect the fresh surface.
Stickiness: Do not be surprised if the Top Coat feels slightly sticky ("tacky") at first. This is completely normal for this system and disappears as soon as the boat is in the water.
4.2 Post-processing support areas (Jacking up)
As soon as the boat hangs in the crane (or has been moved), the areas where the boat previously stood (support pads) become accessible. These must now be reworked.
Preparation: Sand these small areas with P180 and clean them thoroughly with Degreasing Solution (1:10). Let dry!
Layer build-up: Now quickly apply the missing layers (if applicable Primer - Adhesive Coat - Top Coat).
Overlapping: Work in such a way that the new layers overlap the edges of the already painted surface. Thanks to the previously left margins (5 cm steps), you will now get a seamless transition.
Launching: You do not have to wait another 36 hours for these small spots. The boat can be launched as soon as the Top Coat on the reworked spots is touch-dry (after approx. 4–6 hours).
4.3 Curing and the first weeks in the water
F2 EcoHull is a modern system that needs water to reach its final hardness.
The curing process: Complete chemical curing is only completed after approx. 8–12 weeks in the water.
Longer time on land: There is no maximum time on land before launching. If your boat remains on land for a longer period after coating, you can support curing by lightly misting/moistening the hull (as soon as it is touch-dry) with fresh water.
First cleaning ("Early Clean"): After the first 8–12 weeks in the water, gentle cleaning with a soft sponge or cloth is recommended. This removes the initial biofilm and ensures that the fouling-release system can develop its full performance.
Detailed documents can be found under Datasheets & Downloads.